A fresh coat of paint refreshes a space, but great results come from much more than color choice. The right interior paint, applied correctly and maintained with care, can transform walls, hide imperfections, and stay beautiful for years. Whether you’re repainting a single room or planning a home-wide project, understanding paint types, finishes, application methods, and maintenance is key to success.
Why Interior Paint Matters More Than You Think
Interior paint does more than decorate. It seals surfaces, protects drywall, resists stains, and helps your rooms feel clean and fresh. Poorly chosen paint can peel, fade, or get damaged quickly. A high-quality interior paint withstands everyday wear, maintains color, and requires fewer repaints over time. For people spending time indoors, paint also affects aesthetics, mood, and even the perception of lighting and space.
Types of Interior Paint
Choosing the right formula is critical. Here are the main types you’ll encounter:
Latex / Water-Based Paints are the most common. They dry relatively fast, have lower odor, and clean up with water. Modern versions include acrylic resins for adhesion and flexibility.
100% Acrylic Paints are a premium variant. They provide better durability, resist peeling, and maintain color even under challenging conditions.
Oil-Based / Alkyd Paints are less common now, but still useful for trim, doors, and surfaces needing a hard, glossy finish. They dry more slowly and require solvent for cleanup.
Hybrid & Specialty Paints blend characteristics of latex and oil. Some are formulated for mold resistance, low VOC, or better scrub resistance in high-use areas.
Primers are also essential. They prepare surfaces—especially new drywall, patch jobs, stains, or drastic color changes—and ensure better adhesion for the topcoat. Skipping primer often leads to inconsistent results.
Understanding Paint Finishes (Sheen)
The finish of an interior paint affects both appearance and performance:
-
Flat / Matte has no gloss, hides imperfections, and gives a soft look. It is less washable and best for ceilings or low-traffic walls.
-
Eggshell offers slight sheen, better cleanability, while still concealing wall flaws. Good for living rooms or bedrooms.
-
Satin / Pearl gives a moderate shine and is easier to clean. Works well in hallways, kids’ rooms, or moderate-use areas.
-
Semi-Gloss is robust, moisture-resistant, and ideal for kitchens, bathrooms, doors, and trim.
-
Gloss / High Gloss is very shiny, highlights architectural detail, and is easy to clean. Best used on trim, molding, and accent areas.
Choosing the correct sheen for each room helps balance appearance and durability.
Room-by-Room Interior Paint Advice
Different rooms have distinct demands. Here’s how to match paint to function:
In living rooms & bedrooms, softness and ambiance matter. Eggshell or satin finishes with mid-quality interior paint are ideal—cleanable without being overly glossy.
In kitchens & bathrooms, you face moisture, grease, and splashes. Use mold-resistant paint with semi-gloss or satin finishes. Proper ventilation helps the paint last longer.
Entryways, halls, and stairs get heavy use and scuffs. Use satin or semi-gloss paint that’s easier to wipe clean without losing appearance.
Doors, trim & moldings benefit from gloss or high-gloss finishes that highlight detail and stand up to contact and cleaning.
For ceilings, flat or matte finishes minimize glare and conceal ceiling imperfections.
How to Pick the Right Interior Paint
To choose well, follow these steps:
-
Assess the surface — fresh drywall, patched patches, glossy paint, or rough texture.
-
Decide on performance needs — high-traffic rooms need more durable paint.
-
Pick an appropriate finish based on room function.
-
Select a good formula — low VOC, color stability, warranty options matter.
-
Test color & sheen — paint small swatches to see how it looks under different lighting.
-
Calculate quantities — allow extra for edges, retreating, and future touchups.
Applying this thought process helps reduce mistakes and ensures satisfaction.
Application Techniques for Best Results
Even top-tier interior paint can fail with poor technique. Follow these best practices:
Begin by prepping surfaces: clean, repair holes or cracks, sand glossy spots, and remove dust. Use painter’s tape and drop cloths to protect trim and floors. If needed, apply primer to bare surfaces or stained areas.
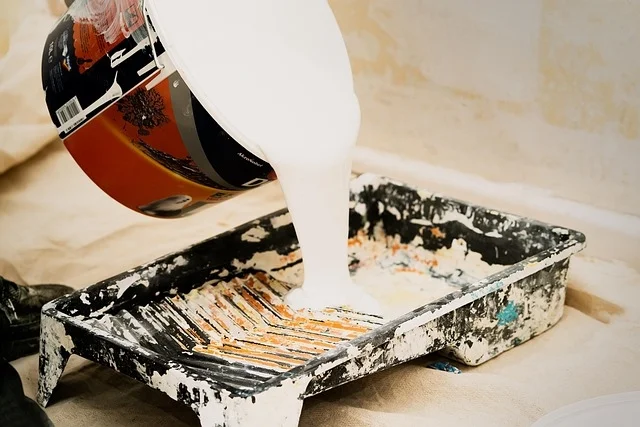
Always cut in edges first with a brush. Then use a rolling technique: roll in “W” or “M” patterns, then fill in, maintaining a wet edge to avoid lap marks. Apply two thinner coats instead of one thick coat to ensure even drying and adhesion. Stir paint thoroughly before use and occasionally during application. Allow proper drying time between coats as recommended. Clean brushes, rollers, trays, and parts immediately after use.
Maintenance & Touch-Ups
A good paint job endures when maintained. Lightly dust and wash walls with gentle soap solutions. Avoid harsh scrubbing, especially on flat finishes. Keep a small leftover container of interior paint for touch-ups—use it to repair dings or scuffs before they worsen. In humid areas, watch for mold and clean early. Monitor high-use zones (behind furniture, around switches) and repaint selectively when fading or wear emerges.
Common Mistakes to Avoid
Many failures are preventable. Don’t skip primer on patched or new surfaces. Avoid painting in extreme temperature or humidity. Don’t apply thick coats in one pass. Use cheap brushes or rollers—they degrade quality. Overlap strokes after paint dries, causing streaks. Ignore surface prep—dust, grease, or loose paint ruins adhesion. Neglect maintenance—small damage spreads. Avoid these pitfalls to preserve both beauty and function.