Nail art has become increasingly popular in recent years, with individuals expressing their creativity through unique and intricate designs on their nails. To achieve professional-looking nail art, it is essential to have the right tools and materials. One such tool that has gained recognition for its versatility and effectiveness is 180 grit sanding tape. In this article, we will delve into the world of 180 grit sanding tape, understanding its composition, characteristics, advantages, and various applications in nail art. Additionally, we will provide tips for using this tool effectively to achieve stunning nail art designs.
Understanding 180 Grit Sanding Tape
Before we explore the applications of 180 grit sanding tape in nail art, let's first understand what it is. 180 grit sanding tape is a type of abrasive material that is commonly used in various industries, including woodworking, metalworking, and automotive. It is made up of a flexible backing material, typically cloth or paper, with abrasive particles adhered to one side. The term "180 grit" refers to the size of the abrasive particles, indicating the level of coarseness or fineness of the tape.
Composition and Characteristics
180 grit sanding tape is composed of several layers, each serving a specific purpose. The backing material provides flexibility and durability, allowing the tape to conform to different shapes and contours. The abrasive particles, which are typically made of aluminum oxide or silicon carbide, are evenly distributed on the adhesive side of the tape. These particles are responsible for the sanding and smoothing action of the tape.
The characteristics of 180 grit sanding tape make it an ideal tool for nail art. Firstly, its flexibility allows for easy manipulation, enabling users to reach even the most intricate areas of the nail. Additionally, the adhesive backing ensures that the tape stays securely in place during use, preventing any accidental slips or movements. Moreover, the abrasive particles are designed to provide a consistent and uniform sanding action, resulting in a smooth and polished surface.

Advantages of Using 180 Grit Sanding Tape
There are several advantages to using 180 grit sanding tape in nail art. Firstly, it allows for precise shaping and contouring of the nails. The tape's flexibility and fine grit enable users to achieve the desired nail shape with ease. Whether it's creating sharp edges, rounded tips, or unique nail shapes, 180 grit sanding tape provides the necessary control and precision.
Furthermore, 180 grit sanding tape is excellent for removing excess nail polish or gel polish. Its abrasive particles effectively remove layers of polish without damaging the underlying nail. This makes it an essential tool for correcting mistakes or achieving a clean canvas for new nail art designs.
Another advantage of using 180 grit sanding tape is its ability to smooth out the nail surface. It can effectively buff away ridges, bumps, or unevenness on the nail, resulting in a smooth and flawless base for nail art. This is particularly beneficial for individuals with naturally uneven or ridged nails.
Nail Art Tools Utilizing 180 Grit Sanding Tape
Now that we understand the composition and advantages of 180 grit sanding tape let's explore the various nail art tools that incorporate this versatile material.
Nail Files: Nail files are a staple tool in any nail art kit. They come in various shapes, sizes, and grits, including 180 grit sanding tape. Nail files with 180 grit sanding tape are perfect for shaping and smoothing the nails, allowing for precise nail art application.
Buffing Blocks: Buffing blocks are multi-sided tools that are used to shape, smooth, and shine the nails. Some buffing blocks feature a side with 180 grit sanding tape, allowing for gentle buffing and smoothing of the nail surface.
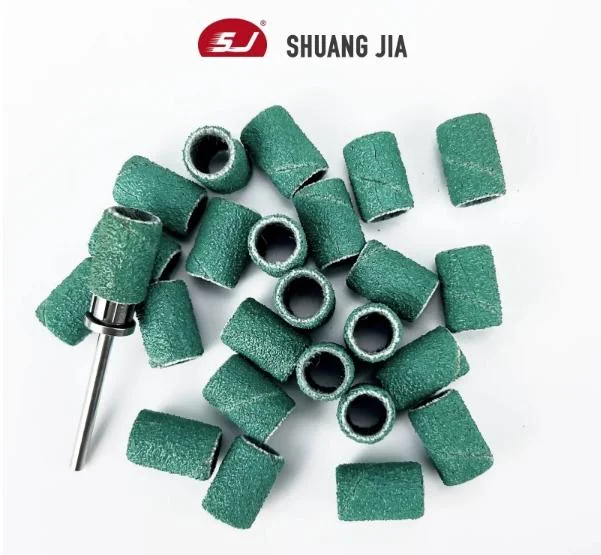
Nail Drill Bits: Nail drill bits are commonly used in professional nail salons for various nail treatments. Some nail drill bits feature a coating of 180 grit sanding tape, providing a gentle and controlled sanding action for nail preparation and shaping.

Applications of 180 Grit Sanding Tape in Nail Art
Now that we have explored the nail art tools that utilize 180 grit sanding tape let's delve into the various applications of this versatile material in nail art.
Nail Preparation: Before applying any nail art design, it is crucial to prepare the nails properly. 180 grit sanding tape can be used to gently buff the nail surface, removing any shine or oils. This ensures better adhesion of nail polish, gel polish, or nail art decorations.
Shaping and Contouring: 180 grit sanding tape is excellent for shaping and contouring the nails. Whether it's creating square, round, almond, or stiletto-shaped nails, the tape allows for precise shaping and smooth edges.
Smoothing and Buffing: Uneven or ridged nails can be a challenge when it comes to achieving a flawless nail art design. 180 grit sanding tape can effectively smooth out the nail surface, creating a perfect canvas for nail art application.
Gel Polish Removal: Gel polish can be challenging to remove, especially without damaging the natural nail. 180 grit sanding tape can be used to gently remove the top layer of gel polish, making the removal process easier and safer.
Nail Art Corrections: Mistakes happen, even to the most experienced nail artists. 180 grit sanding tape can be used to correct any smudges, uneven lines, or mistakes in nail art designs. Its fine grit allows for precise sanding without compromising the overall design.
Tips for Using 180 Grit Sanding Tape Effectively
To make the most of 180 grit sanding tape in nail art, here are some tips for using it effectively:
Start with clean and dry nails: Before using 180 grit sanding tape, ensure that your nails are clean and free from any oils or lotions. This will ensure better adhesion and prevent any potential damage to the nail.
Use gentle pressure: When using 180 grit sanding tape, apply gentle pressure to avoid excessive filing or sanding. The tape's abrasive particles are designed to work effectively with minimal pressure.
Work in one direction: To achieve a smooth and even result, always file or sand in one direction. Avoid back-and-forth motions, as this can cause unevenness or damage to the nail.
Take breaks: If you are using 180 grit sanding tape for an extended period, take breaks to prevent overheating of the nail or discomfort. This will also allow you to assess your progress and make any necessary adjustments.
Follow up with a finer grit: After using 180 grit sanding tape, it is recommended to follow up with a finer grit to further smooth and refine the nail surface. This will ensure a flawless base for nail art application.

Conclusion
180 grit sanding tape is a versatile and effective tool in the world of nail art. Its composition, characteristics, and advantages make it an essential tool for shaping, smoothing, and preparing the nails for various nail art designs. Whether you are a professional nail artist or a DIY enthusiast, incorporating 180 grit sanding tape into your nail art toolkit will undoubtedly elevate your nail art game. Remember to follow the tips provided to use this tool effectively and achieve stunning nail art designs.